Once in a while a mouse moves into my unfinished attic. Mice are disease-ridden breeding machines, but I would rather not torture or kill them. So, despite CDC recommendations, I use live traps and release them to a nearby wooded area.
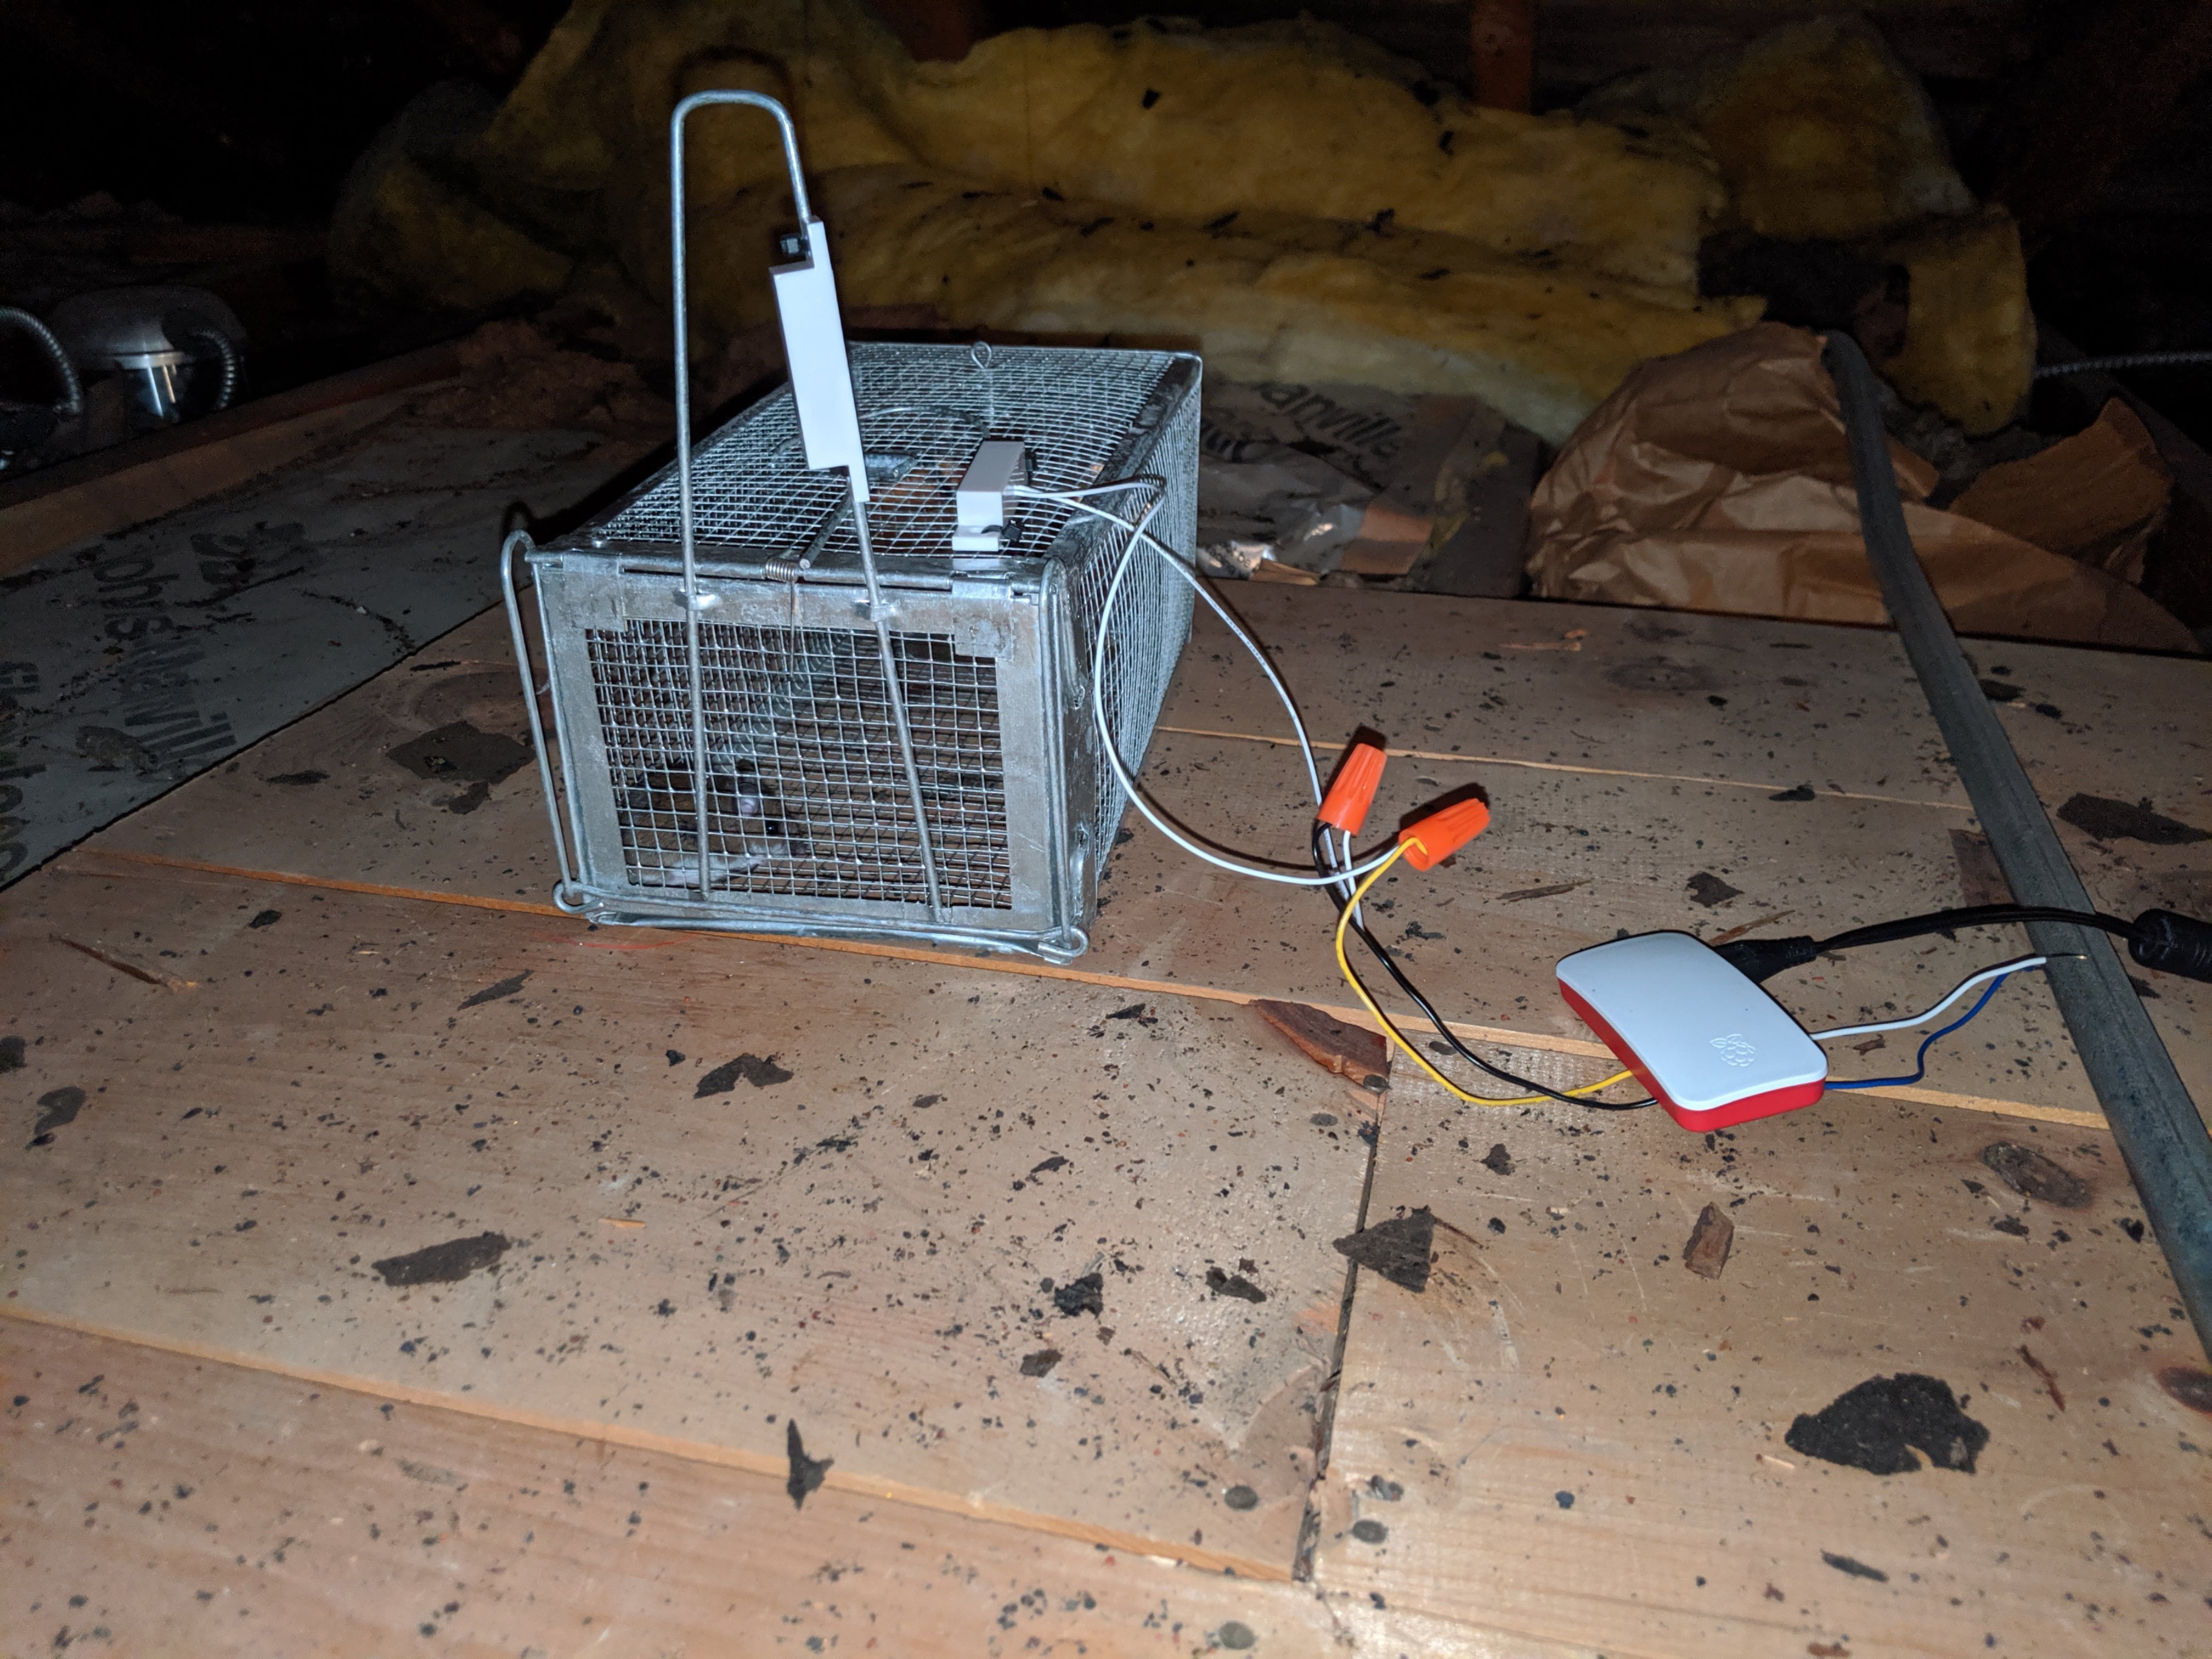
Live trapping is a chore. You have to check the trap often lest they starve to death, so you only set traps after signs of rodent activity. By that point they have set up a breeding operation and started multiplying. Add a Raspberry Pi, a contact sensor, and gpio_httpd, and you can live trap 24/7, evicting them before they reproduce.
Do as I say, not as I do. Listen to the CDC, especially if you are pregnant, you have a weakened immune system, or you live west of the Mississippi. But if you still want to live trap then read on.
Shopping
WARNING: affiliate links ahead
- Raspberry Pi Zero W and case - Any Pi will do. Zero W’s are currently $5 in-store at Micro Center
- Power supply - 2.5A for a Pi Zero is overkill, you can probably use a spare phone charger
- 16GB microSDHC card and SD card reader
- AmazingTraps, AB Traps, or another similar style trap
- Magnetic contact sensor
You can track several traps with one Pi. Buy more traps, more contact sensors, and more wire if necessary
Other tools and supplies
- Hand sanitizer, bleach, disposable gloves, and N95 masks
- Soldering iron and solder - Pi Zero only
- Zip ties
- Jump wire or hook-up wire kit
- 100’ 20 gauge hook-up wire - if your Pi will not be located near your trap
- 30-20 gauge wire strippers
- Wire nuts
Prepare your SD card
- Download Raspbian Buster Lite
- Write the image to your SD card
- Set up wireless access and enable SSH
- Insert the SD card into your Pi
Assemble your trap
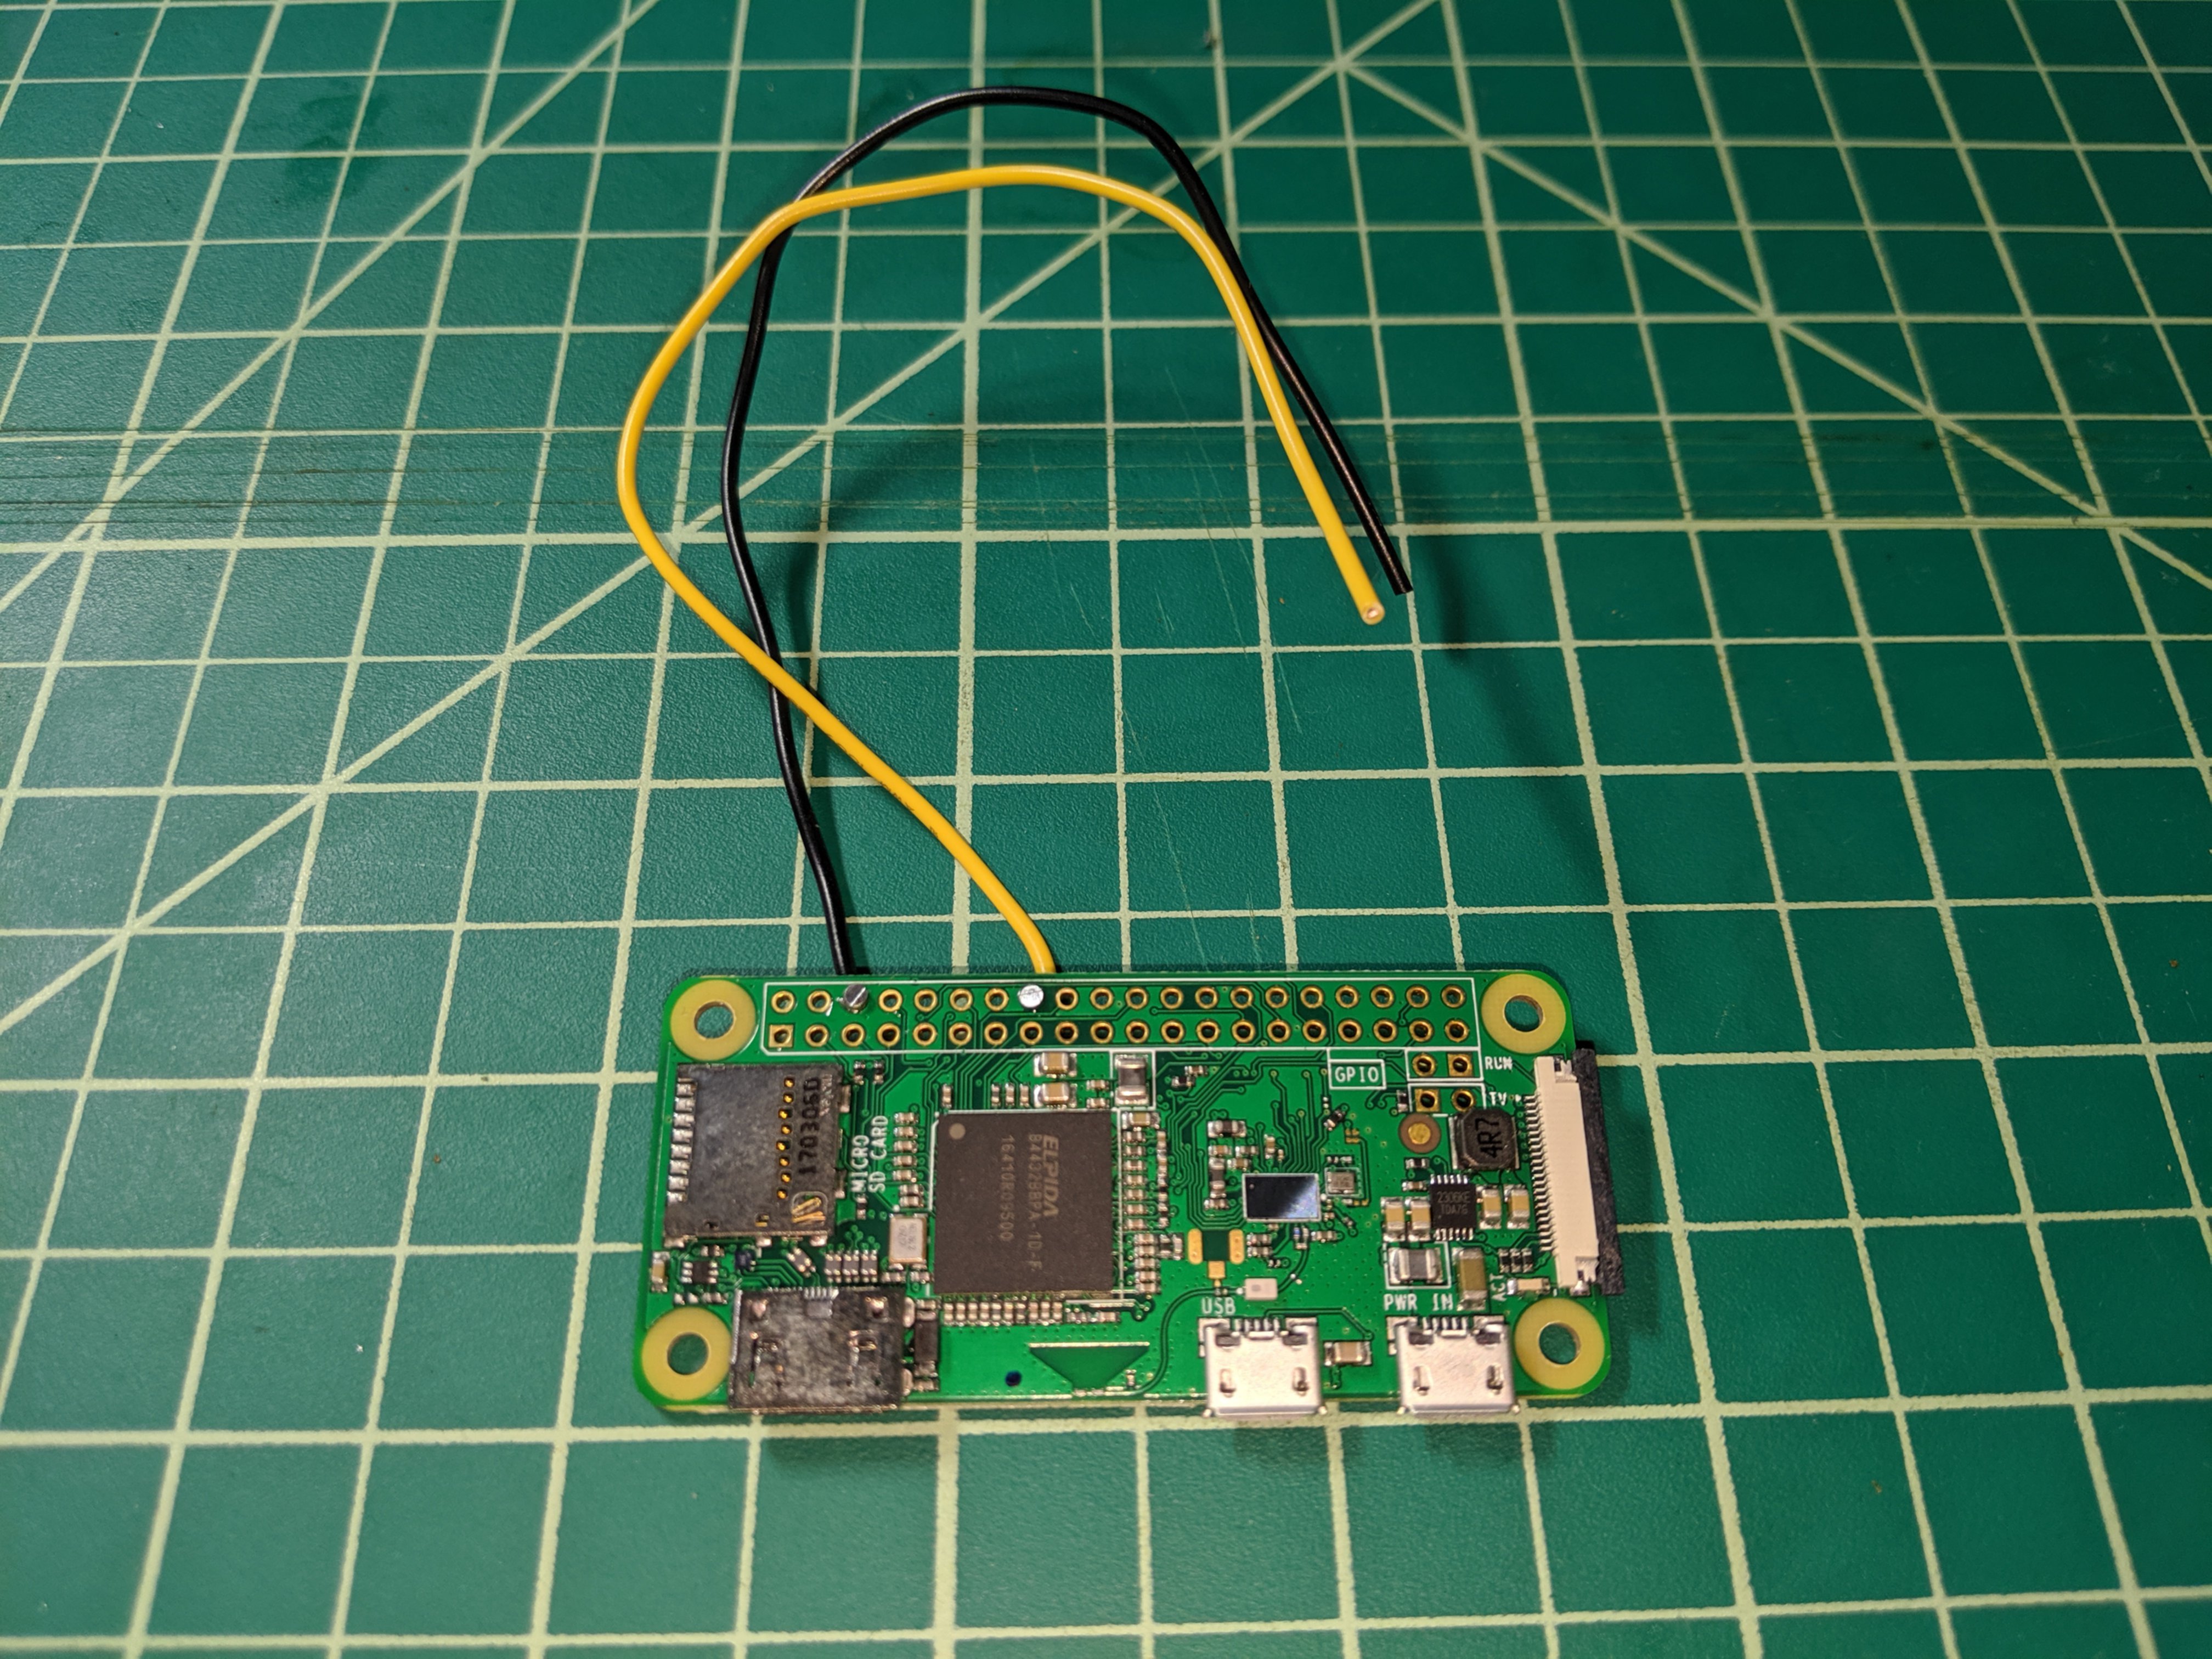
Refer to pinout.xyz for a pinout diagram. Insert the wires underneath the board so they exit the bottom of the Pi Zero case.
- Solder one wire to ground
- Solder one wire to BCM 23
Solder more wires to GPIO pins to add traps. You need one GPIO pin per trap. Traps can share the same ground wire.
Secure the magnetic contact sensor to the trap with zip ties, making sure you don’t zip tie the handle to the cage. The sensor will be separated when the trap is closed.
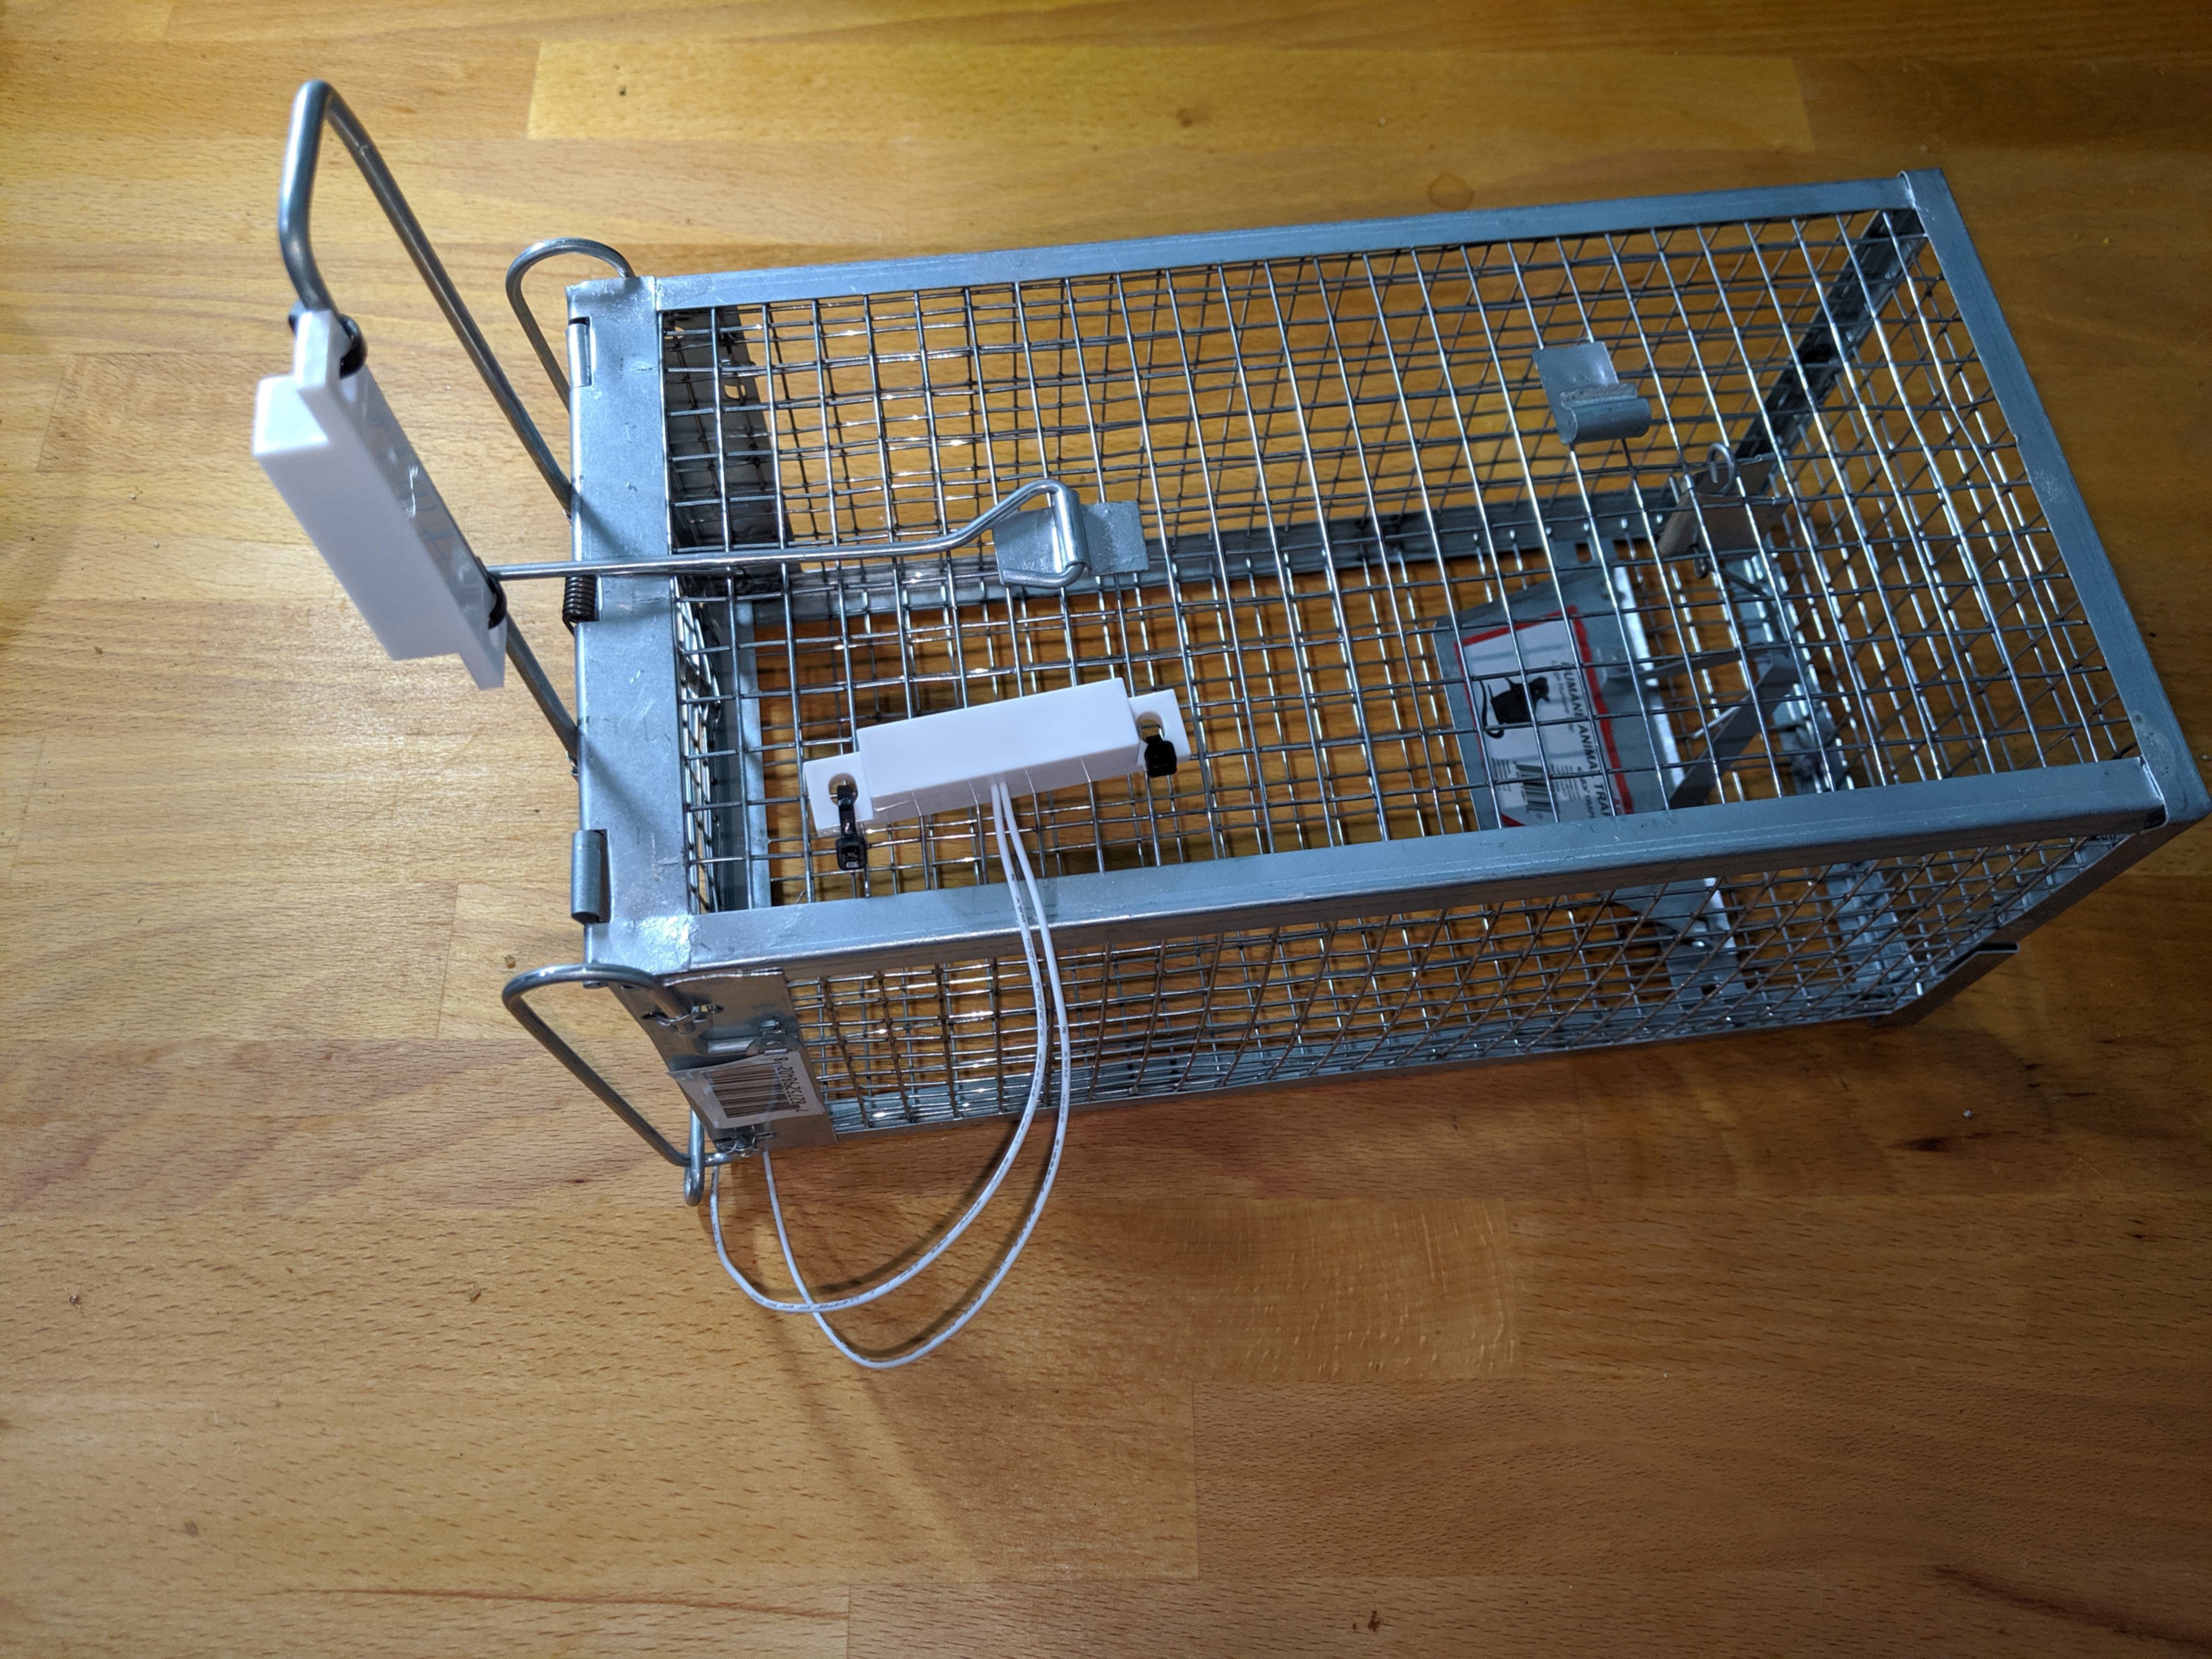
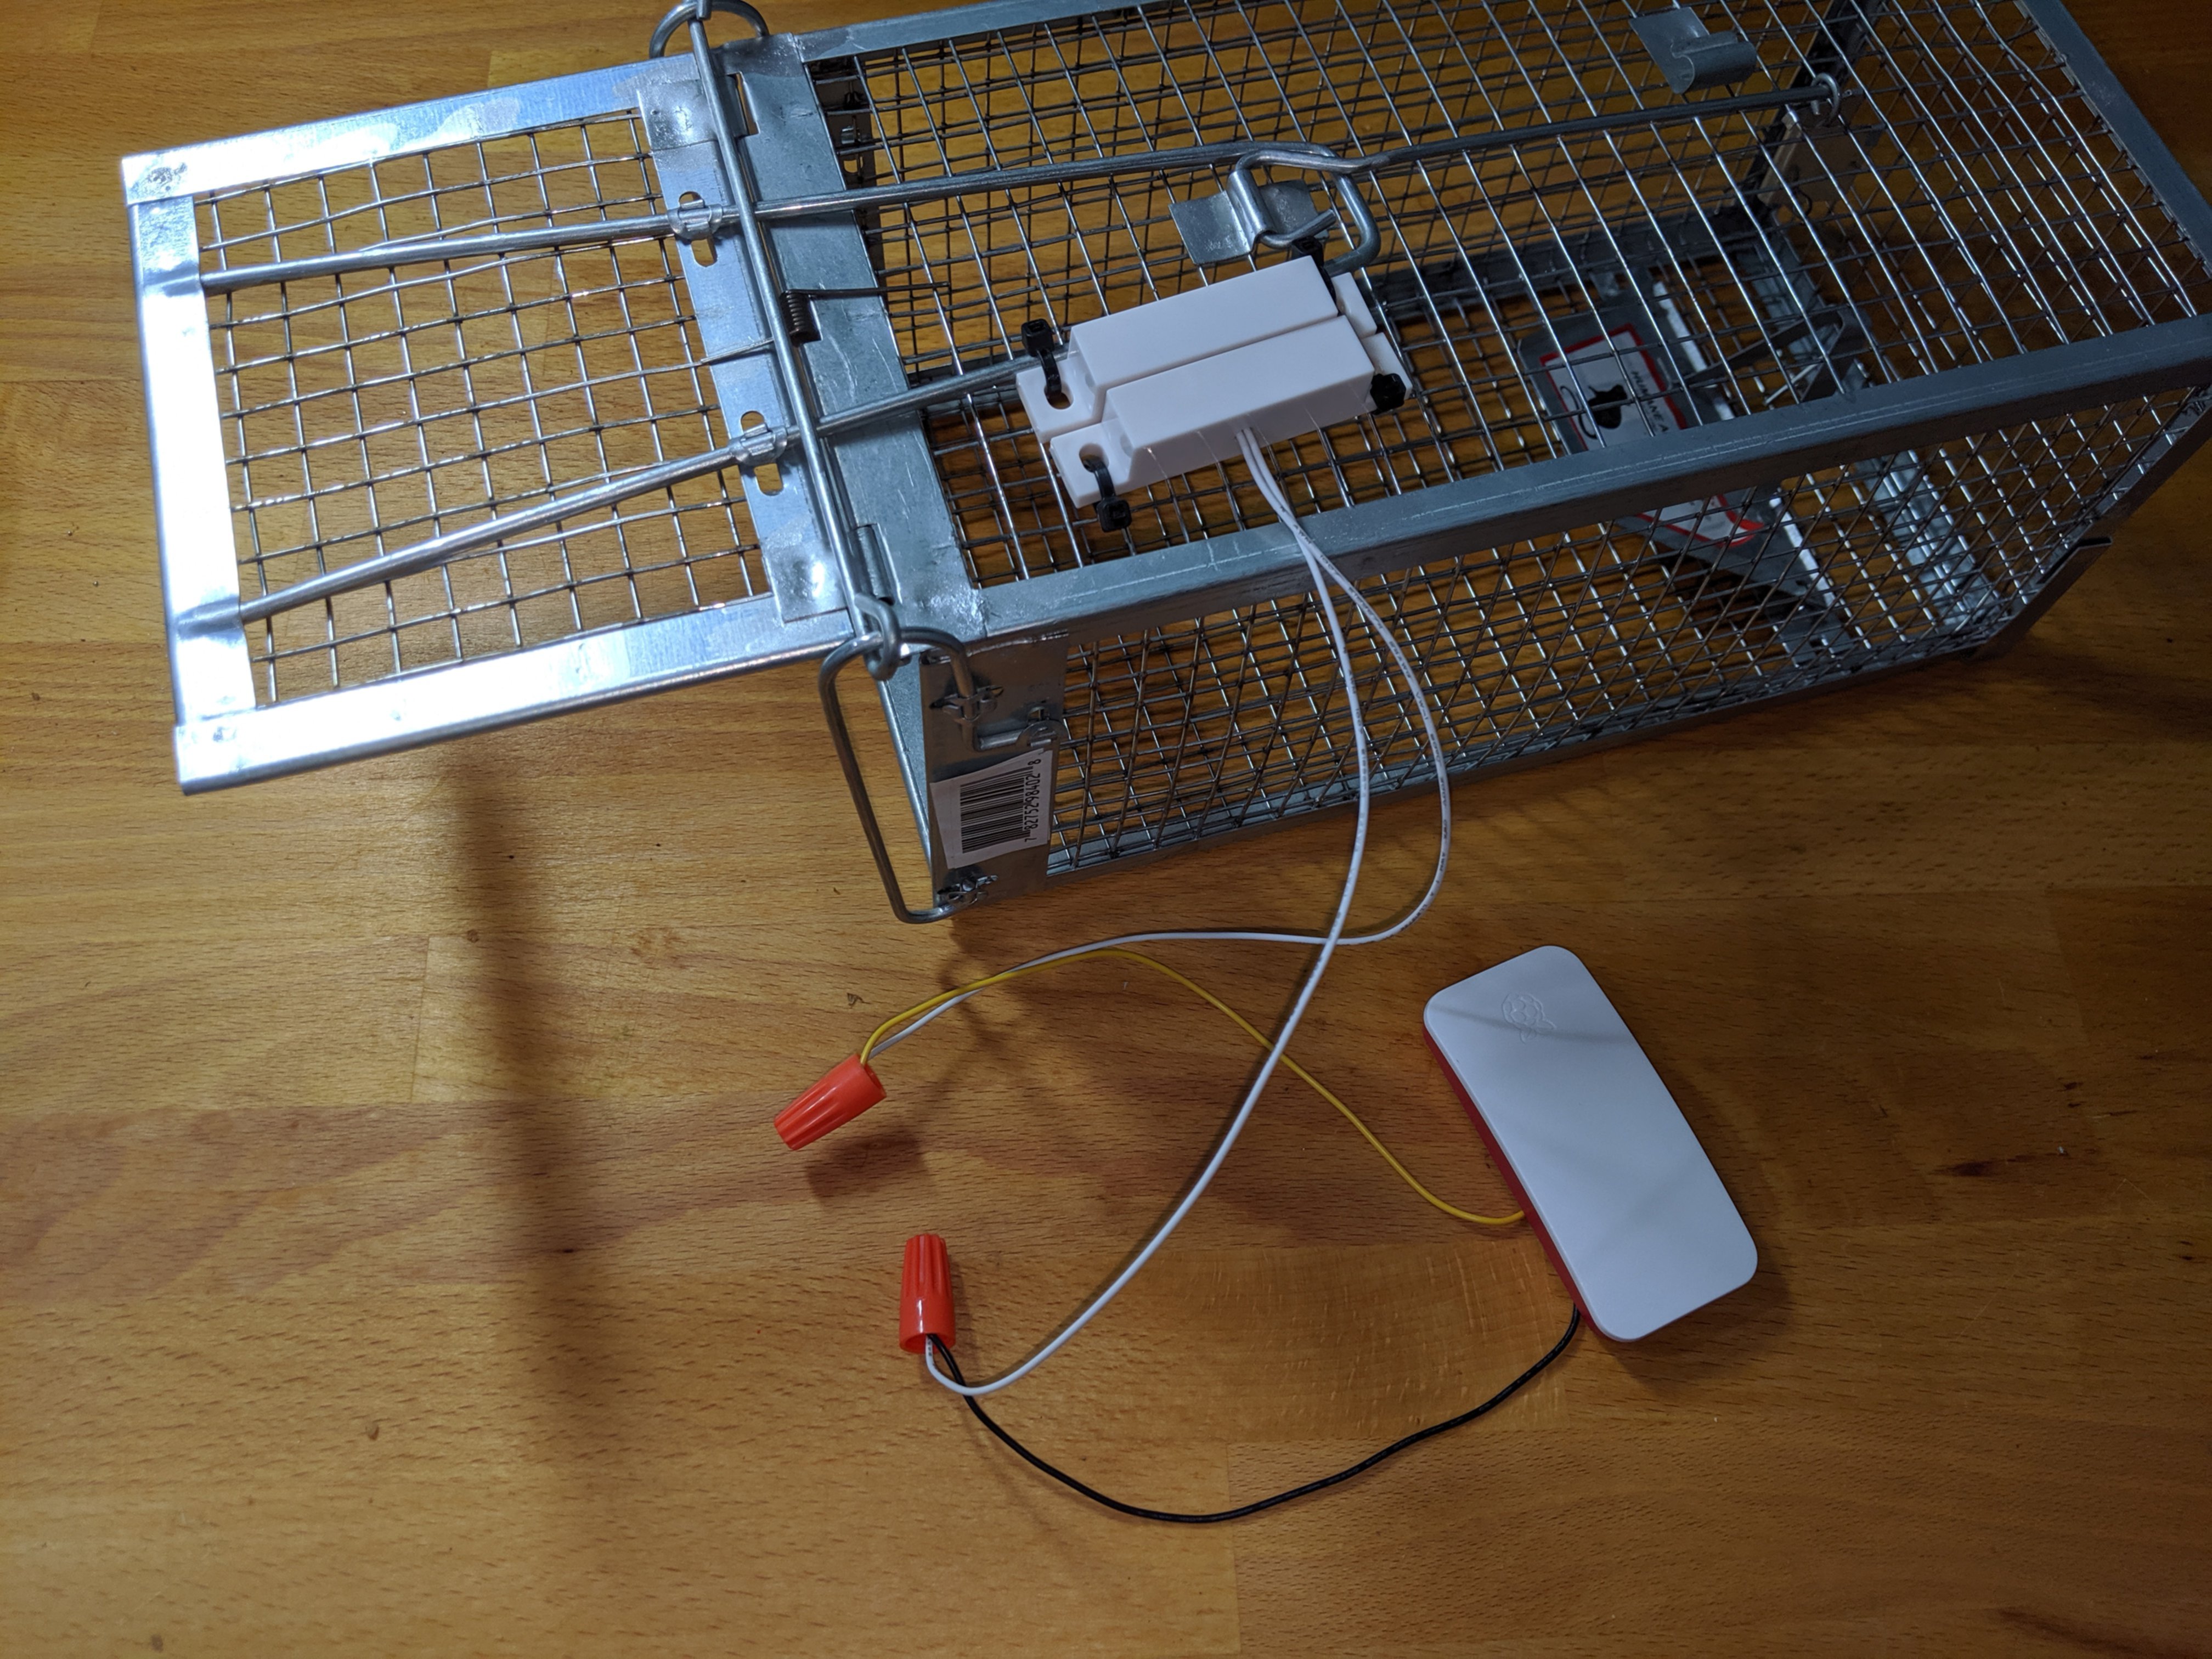
Strip the ends of your wires and connect them to the sensor using wire nuts. Use a wire spool and more wire nuts if your Pi will be located further away from the trap.
Log in to your Pi
- Power up your Pi
- Find the IP address of your Pi
- SSH into your Pi (Linux/macOS or Windows)
- Run
passwdand replace the default password
Install Docker
Paste the following into your SSH session:
sudo -- sh -c "
  curl -fsSL https://get.docker.com | bash &&
  usermod -aG docker pi"
At the time of writing ARMv6 users (e.g. Pi Zero W) also need to downgrade containerd.
Finally sudo reboot, SSH back in, and docker run hello-world to test your
Docker install.
Start a web server
Now we’re going to use gpio_httpd to read our GPIO pins remotely. Run the following command in your SSH session:
docker run \
  --name mousetrap \
  --device "/dev/gpiomem" \
  --publish "80:80" \
  --restart always \
  --detach \
  bakerba/gpio_httpd
Test out your trap by typing curl localhost/input/23. You should see 0 if
the trap is open or 1 if its closed.
Set your trap
If you already have mice then bait your trap with peanut butter. Otherwise bait your trap with non-perishable food, like beef jerky, and if ants are a problem use seeds.
Unscrew the wire nuts to detach the trap from your Pi before transporting the critter to its new home. And make sure the mouse can run for cover so he doesn’t end up like Whiskers.
Check your trap
Anything that can check the trap and notify you will work. Some simplistic examples:
- Linux/macOS/WSL: cron job that runs
if [ $(curl your-pi-address/input/23)==1 ];thennotify-send/osascript/BurntToastyourself a desktop notification. - Android: Periodically run an HTTP Request action in Tasker
- iOS: Create a repeating Get Content from URL in Shortcuts
In an upcoming post I’ll show you how to set up Home Assistant to send an SMS when you catch a mouse or your trap goes offline.